Have you ever hesitated to alter a favourite jumper because the work felt complicated, conspicuous, or liable to distort its shape? Discreet reinforcements let you shore up weak points in advance, turning what might have been a major alteration into a swift, concealed mend.
This post explains how hidden patches, reinforcing stitches, and strategic placement extend a garment’s life by strengthening stress points before they fail. It offers practical guidance on suitable materials, stitch types, placement, and simple maintenance, so repairs remain tidy, durable, and easy to alter.

Why discreet reinforcements matter in heritage utility garments
Discreet reinforcements work by redistributing load away from a weak spot. A small backing or narrowly sewn patch can arrest a nascent tear, converting what would become an alteration into a localised repair. This follows a simple engineering principle: reducing concentrated stress prolongs a fabric's life. Garments tend to fail at predictable points, such as collar and cuff seams, pocket corners, inner thighs, and hems. Early signs appear as fibre thinning or fuzzing, which show up when you gently stretch the area, hold it to the light, or check it by touch. A small, hidden reinforcement concentrates repair only where it is needed, preventing a minor fault from widening with repeated wear.
Choose materials that mirror the original garment. Use a lightweight woven backing or fusible tape to stabilise the area, patches cut from a fabric matching the garment in fibre content, weight, and weave, and a stronger thread. Matching fibre and weight helps prevent puckering and uneven shrinkage during wear and laundering. A reliable, repeatable workflow is: clean and press the damaged area; cut a patch slightly larger than the defect; baste or fuse the patch to hold it in place; sew a small, neat stitch around the perimeter, adding targeted tacks where stress concentrates; trim any excess and press again. Finally, move the fabric through its normal range of motion to confirm the repair sits flat and remains flexible. Recheck reinforced areas after laundering, and pre-empt visible damage by reinforcing high-use zones before signs of wear emerge. Keep a simple log of recurring weak spots so future garments or patterns can be adapted. With suitable materials and a consistent method, complex alterations become quick, local mends.
Takes reinforcement and endures daily wear.

How to apply discreet reinforcement techniques to extend your favourite workwear garments
Apply the same principle to workwear: redistribute load away from a crack, reduce peak stress, and convert a potentially propagating failure into a local repair. For example, a flexible mesh placed behind plaster, or a thin bonded plate behind a cracked panel, will bridge the defect, tie into sound substrate, and spread bending and shear so the remaining damage can be patched rather than replaced. Suitable materials include open-weave fabric, thin metal strips, composite tapes, and timber cleats; select materials with stiffness, permeability, and corrosion resistance compatible with the host. Prepare the surface by cleaning, roughening, and priming. Where shear transfer or variable substrates demand positive anchorage, use mechanical fasteners, and where continuous contact and a sealed face are required for longevity, prefer adhesives.
Keep installations hidden yet accessible, and apply the same discretion to garments and larger assemblies. Make a small access port, then position the reinforcement so it bridges the defect and anchors into sound material. Secure the repair with the chosen fastener or adhesive, and close the port. Finish edges with a scarf joint, match the surrounding surface texture, and disguise the access as trim or a removable panel. A discreet access point converts a full strip-out into a local, repeatable repair. Verify performance with visual and tactile checks, followed by a light load test to confirm reduced movement. For sensitive substrates, use simple moisture or continuity probes. Reduced deflection under load and stable probe readings reveal remaining weak spots you can target, avoiding the need to replace entire assemblies.
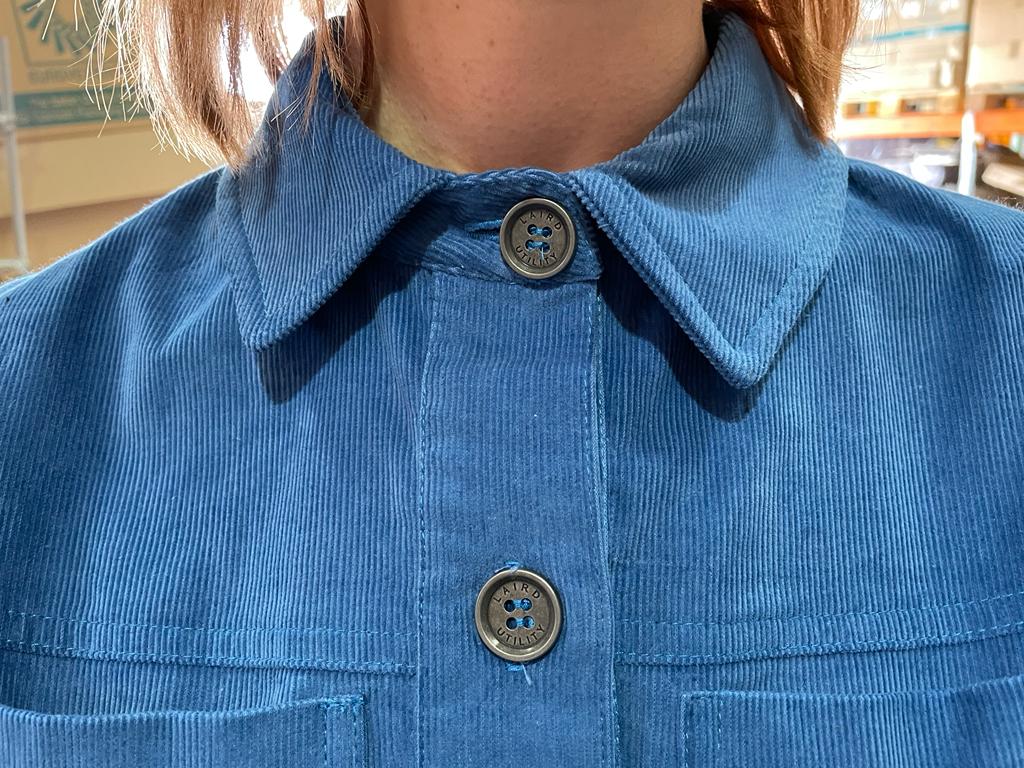
Pick a sturdy, repair-friendly jacket for discreet local repairs.

How to choose materials, stitching, and placement for durable utility garments
Match the reinforcement to the garment's fibre and weave, not its colour. Cut patches from a fabric of similar weight and weave so the drape remains smooth and the patch does not pucker. Use a thread with similar fibre content to reduce differential shrinkage, and test a scrap after pressing or laundering to confirm how the materials behave. Choose stitch type and machine settings to suit the fabric: straight stitches for stable woven cloth, a small zigzag or stretch stitch for knits, and shorter stitch lengths in high-stress areas so the load spreads evenly. Secure the start and finish with a backstitch or small bar tack. Baste the patch first, then machine-stitch from the interior to keep visible stitching to a minimum.
Place reinforcements on the garment interior where possible, aligning them with the fabric grain and the direction of stress. Position patches under seam allowances, inside hems, or behind worn elbows and knees so the repair stays discreet while transferring load away from the damaged area. Choose shapes and constructions that reduce tear initiation and bulk: use round patch corners rather than square to avoid stress concentration, cut narrow reinforcing strips to run along seams, and apply lightweight fusible interfacing behind fragile weaves to stabilise the zone. Trim excess fabric, press patches through a protective cloth, and hide final stitching in the seam allowance or beneath a pleat to preserve hang and stretch. Test the reinforcement through realistic movement, finish edges to minimise fraying, and note that a discreet, well-executed reinforcement can often remove the need for a more extensive alteration.
Material, stitching and placement: practical checklist
- Match materials, then test: identify the garment fibre and weave, choose a patch cut from a similar-weight weave, pick a like-for-fibre thread and an appropriate stabiliser or interfacing, then sew and launder a scrap to confirm shrinkage and press behaviour.
- Set stitch type, machine settings, and needle to suit the fabric: use straight stitches for stable wovens, a small zigzag or stretch stitch for knits, shorten stitch length in high-stress zones so load spreads, secure starts and ends with a backstitch or small bar tack, baste the patch first, and select a needle point and size that suit the fabric before testing on a scrap.
- Place and shape reinforcements to reduce visibility and tear initiation: mount patches on the garment interior aligned with the grain, position them under seams, inside hems, or behind elbows and knees, cut corners round and strips narrow along seams, apply lightweight interfacing behind fragile weaves, trim excess, press through a protective cloth, hide final stitching in a seam allowance or pleat, and test the repair under realistic movement to confirm durability and drape.

How to use reinforcements for neater, easier everyday mending
Wear concentrates predictably at shoulder seams, crotch seams, waistband attachments, and hemlines. Place a narrow backing or a bartack at each stress point to redistribute load and stop small pulls becoming panel replacements. Choose reinforcements that remain inconspicuous: match fabric weight, follow the weave direction, and harmonise colour tone. Use thin stabilisers behind delicate fabrics, and similar-fibre patches for heavier garments to preserve drape and hand. Cut backings slightly smaller than the visible repair area to avoid bulk, and align the weave with the garment grain for a seamless finish.
Begin by tidying loose threads. Cut a shaped backing slightly smaller than the visible repair area, secure it with stay stitches or a fusible stabiliser where appropriate, and finish with small, even stitches that follow the existing seams. Use short, dense machine stitches to provide durable reinforcement on structural seams, and choose hand slip stitches or neat whip stitches for precise placement on visible areas to minimise distortion of lightweight fabric. A narrow inner waistband lining can arrest fraying without a full replacement, and a hidden elbow patch will preserve sleeve fit. Look for thinning or shiny wear lines or seam gaping as indications that discreet reinforcement will prevent a larger alteration.
Choose a jacket built to last decades.

How to spot, maintain, and tailor garments for easier mending
Begin by identifying common stress points: elbows, cuffs, inner thighs, the seat, knees, and underarm seams. Note early signs of wear, such as fabric thinning, shiny areas, loose threads, or slightly widened seams, and photograph each spot so you can track progression over time. Choose reinforcement materials that suit the garment’s fabric, and test a small sample first to check drape and colourfastness. For lightweight shirts and blouses, use a lightweight woven interfacing that will support the fibre without stiffening the cloth. For knit jumpers, select a stable tricot that preserves stretch while adding stability. For heavier outerwear, prefer matching fabric patches or a thin canvas to retain appearance and durability. Use targeted reinforcement techniques that spread load and remain unobtrusive. Stitch a narrow, folded strip along the seam allowance to distribute stress across a larger area. Add a small bar tack at concentrated points of strain to lock stitches in place. When applying patches, close the edges with invisible slip stitches so repairs lie flat and remain discreet. These modest, considered interventions preserve the lines and character of the piece while increasing its durability.
Make garments easier to mend by leaving extra seam allowance at hems and cuffs, adding removable patch panels or a hidden lining behind high-wear areas, and finishing raw edges neatly so future repairs are quicker and more precise. Adopt simple maintenance routines: rotate pieces to distribute wear, tend to small holes promptly to prevent them widening, and launder according to the garment’s fibre care label. Practical wear tests indicate these measures help spread load and slow fabric degradation, reducing both the frequency and the scale of repairs. Together, discreet reinforcements and thoughtful tailoring turn potential alterations into straightforward mending jobs you can complete at home.
Discreet reinforcements stop small failures before they spread, redistributing load with hidden backings, reinforcing stitches, and matched materials so garments remain wearable and alterations stay localised. Narrow interior patches at predictable stress points, such as cuffs, elbows, hems, and pocket corners, arrest tear propagation and preserve a garment's drape; the effect becomes evident during routine wear and laundering.
Follow guidance on materials, stitch type, and placement, prepare and test each repair, and adopt simple maintenance habits such as rotating garments and logging areas of wear. These small measures keep repairs tidy and durable, make subsequent updates straightforward, and extend a garment's life so you can keep it in regular use.
FAQ
What are discreet reinforcements and why should I use them?
They are small, hidden backings or stitches that redistribute load away from weak spots so a tiny repair arrests tear propagation and prevents a major alteration; applying them at predictable failure points like cuffs, hems, and elbows keeps garments wearable longer.
How do I choose the right materials for a hidden patch?
Match the patch to the garment fibre, weight, and weave rather than the colour, use a like-for-fibre thread and a suitable stabiliser or fusible tape, and test a scrap after pressing and laundering to confirm shrinkage and drape behaviour.
Where is the best place to put reinforcements so they stay discreet?
Fit patches on the garment interior, under seam allowances, inside hems, or behind elbows and knees, align them with the grain and direction of stress, and shape corners round or use narrow strips to reduce bulk and tear initiation.
How should I sew reinforcements to keep them invisible and durable?
Prepare and press the area, baste or fuse the patch, then machine-stitch from the inside using straight stitches for wovens or a small zigzag for knits, secure starts with a backstitch or bar tack, trim excess, press through a protective cloth, and test movement.
When should I reinforce or maintain garments to avoid larger repairs?
Check for early signs such as fibre thinning, shiny wear lines, or loose threads and reinforce before visible holes appear; rotate garments, log recurring weak spots, and leave extra seam allowance or removable panels to simplify future mending.